This used to be Magda's bike:
It was her first bike, she bought it for 22,000 pesetas back in 89. After 5 years, she switched it for a mountain bike and just forgot about it for more than 15 years, until I came along.
Nowadays, "Retro" is the new thing and mountain bikes aren't that cool anymore, so she used to tell me from time to time "We should paint my old bike you know", which basically translates into "You should paint my old bike, don't you think?". Message received. As soon as I had some spare time, I started to "paint" the old bike.
I should warn you that I didn't make as many pictures as I should have, because my hands were too dirty most of the time, so I'm just planning on giving some advice and showing the "before and after" set of pictures.
To be able to understand ourselves, please take a look at this diagram:
Step 1, taking the bike apart.
Before taking it apart, I did take some pictures, and that would be my first advice: Take as many pictures as you can before taking the bike apart, so later on you don't need to remember how everything was before. To take it apart, I used and old set of tools lying around the country house (forgot to mention, the bike was abandoned at the country house), hence my second advice: Get a decent set of tools, you can even enjoy this task if you do (I didn't). You might even need some special bike tool to take apart the crank arms, please ask at your local bike repair shop if they can help you with that.
These are some of the pictures I took at the beginning:
You can see a lot of rust here, but you can also see how everything should be when you need to assemble it again. My last advice for this part: Use your common sense when having some trouble disassembling any tricky parts, don't use any extra force, except for the crank arms and to separate the handlebar from the fork.
Step 2, cleaning: dealing with the rust and the grease.
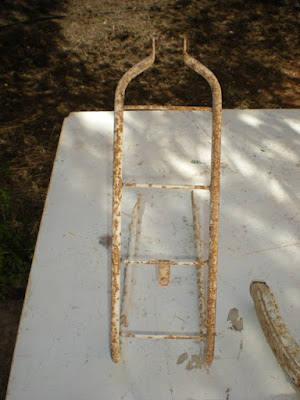
Once I had all the separate parts, I needed to start cleaning them. You can see how rusty they were:
Using sand paper wasn't really an option, so I cleaned the rusty parts by using a Workbench, a Vice, some Clamps, a Drill and a Round Wire Brush. The Vice was attached to the Workbench by using the clamps, the Drill was fixed by using the Vice and the Wire Brush was attached to the Drill. I also had to wear eye protection and appropriate clothes. The Wire Brush can be very good at cleaning rust and removing old paint, however, this whole proccess took me too much time, and it can be done in a much easier way: by submerging all rusty parts into a water solution with Oxalic acid. I really don't know were to get it, but it shouldn't be hard to find. Obviously, you'll need to get a plastic bucket/container, big enough to hold all the parts and be able to submerge them. I really don't know much about this process, but I'll try to link to a web page I found about it. My advice: Try the acid and forget about using a Wire Brush or sand paper, it's just too much trouble.
While you wait for the second part, take a look at this video about the song Bike by Pink Floyd.
Thanks for reading.


No comments:
Post a Comment